Surgical Suturing Techniques Mastery Guide

If you need a suture kit go here.

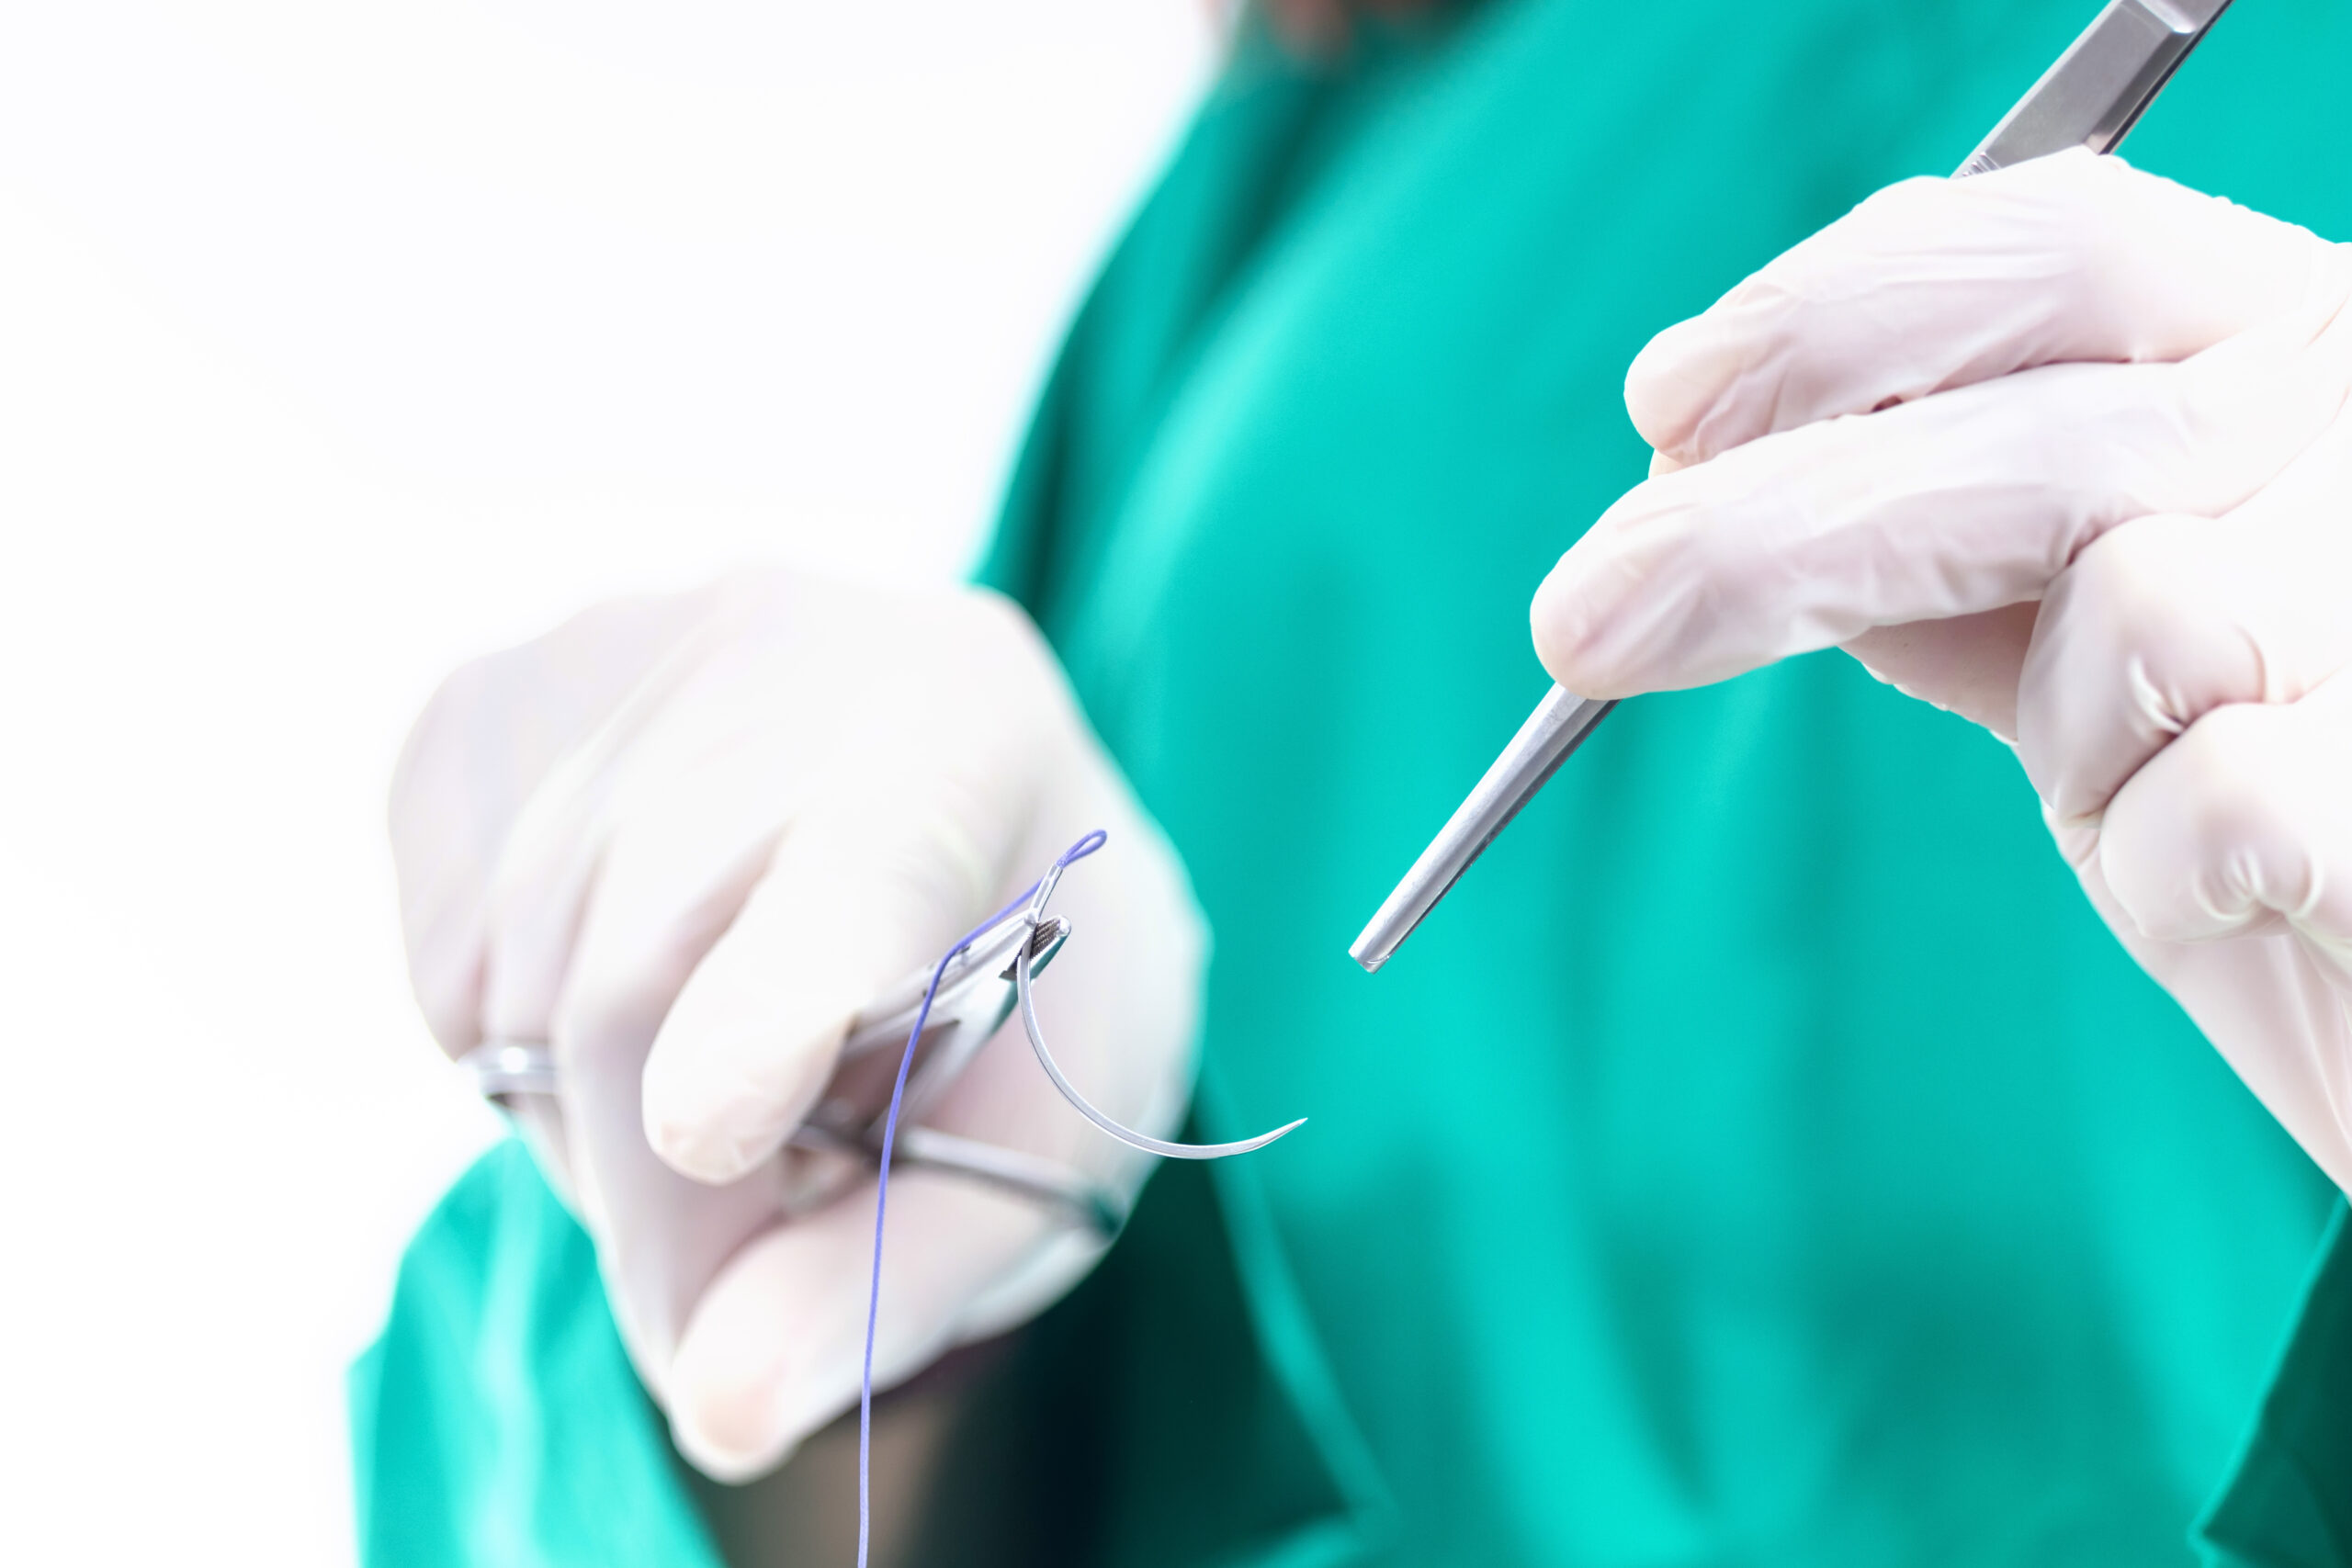
Introduction to Suturing

The primary goal of suturing is to approximate (bring together the wound margins) and to eliminate dead space between wound walls and edges so that underlying tissues are held together. Healing can only occur properly if the two severed areas of tissue align and remain intact. If dead space is not eliminated blood may pool in the wound leading to hematoma and consequently wound strength will be compromised, increasing the risk of infection.

The secondary goal of suturing is minimizing scar tissue formation. Both proper healing and minimal scarring are achieved by accomplishing two main objectives.

The first is ensuring that wound edges are not inverted during closure. Inversion occurs when the epidermis on either side of the wound curls inwards and touches the epidermis on the opposite side. Inversion will delay and/or compromise the healing process and leave an unsightly scar. Therefore, it is vital to proper wound healing and scar reduction to suture wounds so that edges are everted, or slightly lifted outwards.

The second objective is to achieve the best wound edge approximation. This is the process of ensuring that edges are brought together as evenly as possible during suturing. Eliminating dead space and achieving wound edge eversion and approximation are key elements for the proper healing and minimal scarring of a sutured wound.

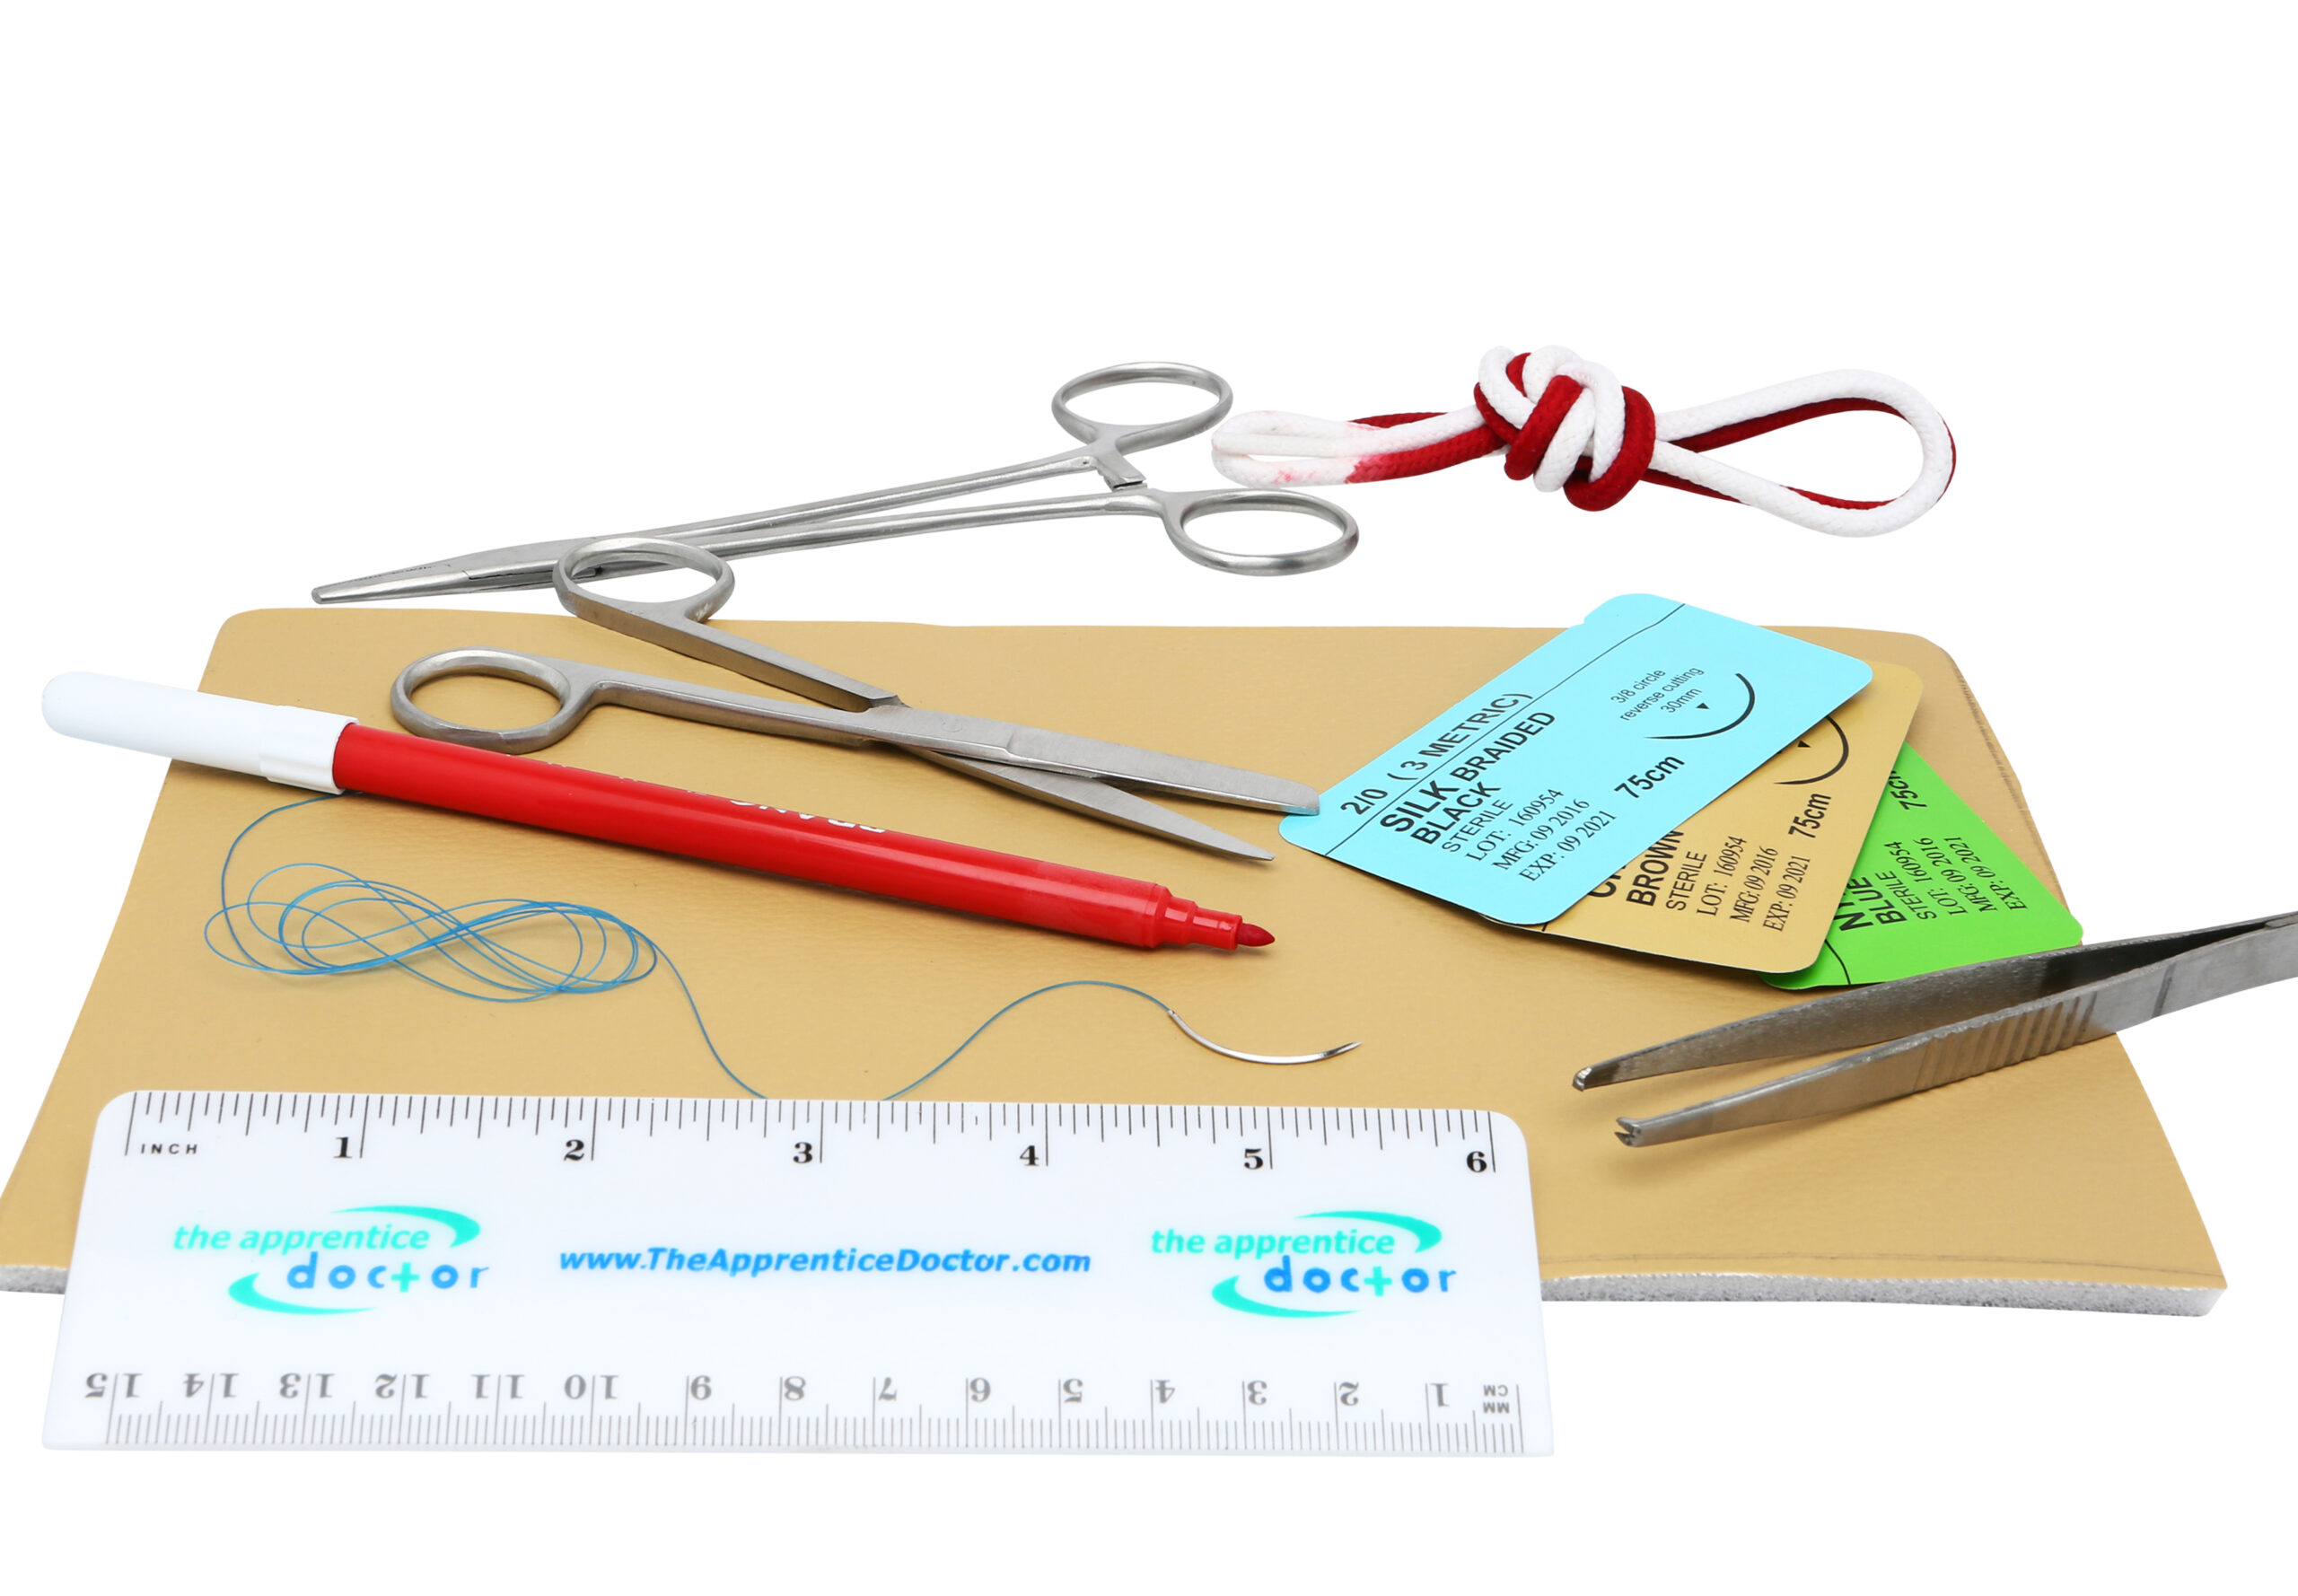
The suture needles, materials, and techniques selected are at the discretion of the surgeon or medical professional assessing the wound. The medical professional will select the appropriate needle, suture material, and suture technique depending on whether or not they want to achieve deep tissue dead space closure, lesser or greater wound tensile strength, less scarring, ease of application or care, etc.

Keep in mind that new non-suturing closure methods are being developed that may be used as alternatives to suturing closure methods. In some situations non-suturing methods are better options than traditional suturing approaches. New methods include absorbable staples, sterile strips, and topical adhesives which can be used in combination with applied suture techniques or alone. Again, the type of suture technique or method must be determined by the treating physician or medical professional with the goal of achieving optimal wound healing and minimal scarring.

Although the use of ‘Steri-Strips’ and ‘suturing glue’ is tempting, it can only be used in very superficial wounds. Otherwise one gets a void below the surface along with associated problems like wound inversion, hematoma formation, wound infection, and wound dehiscence. It is tempting to use these shortcuts in the pediatric trauma patient, especially under the pressure that exists treating a child in the emergency room. If in doubt, suture properly under anesthetic for improved healing and an aesthetically pleasing result.

Choosing the correct suturing technique

The main driver of choice of technique in suturing is the operator’s/surgeon’s personal choice in a specific situation. He/she may gravitate to a specific technique, or combination of techniques, based on his/her knowledge, suturing proficiency, availability of specific suturing materials like suturing thread and needles, and experience gathered over the years. The medical professional will also take into account what works best in his/her hands.

No specific technique fulfills the exact requirements of a specific would closure.

Suturing Techniques – Guide (Infographic)

suturing techniques

Suturing Techniques – Indications and Contra-indications

Here are some guidelines for the inexperienced to help you decide on which suturing technique to use.

Simple Sutures

Interrupted sutures

Interrupted sutures are sutures that are placed and tied individually. For the inexperienced this is the preferred technique due to its ability to close a wound cleanly and securely. If infection occurs in one part of the wound only a few interrupted sutures need be removed to treat the wound leaving other sutures intact. The downside is that interrupted sutures take considerably more time to place than continuous sutures.

Individual interrupted sutures also bring a limited quantity of tissue towards the closure margin – and thus in friable tissue it has a higher tendency to “pull through” when tying the knot.
It is usually not the end of the world if one interrupted suture should loosen or dehisce as the remainder of the interrupted sutures will keep the wound closed. One would not even have to replace a single interrupted suture if it loosens up so long as the resulting dehiscence is minimal and not in a critical area.

Interrupted sutures will also give a good result in curved and non-linear wounds/incisions. Unlike running sutures it will not distort the form of the wound.

Interrupted sutures offer the highest level of control over wound closure and the result. If you perceive that a specific suture is not ideally placed you can remove it and place it in a better position, unlike the running/continuous sutures where you may need to redo the entire running suture. With the interrupted suture you have excellent control over the level of wound eversion.

An unfortunate downside of using an interrupted suture is that the operator has to push the needle through healthy skin adjacent to the wound margins. This brings with it the possibility of leaving needle marks in the form of a visible row of small scars on either side (cross hatching suture marks) next to the wound margin. In esthetically sensitive areas, like the face, a surgeon will remove stitches/sutures by day 4 or 5 and secure the wound with Steri-Strips for another couple of days in an effort to avoid cross hatching scars. Do not leave interrupted facial sutures in for longer than 7 days.

Interrupted sutures with buried knots

In sensitive areas, like a tongue laceration, use the interrupted sutures with buried knots. This technique will avoid irritating the area with the 2 free ends left by a normal interrupted suture. Keep in mind that the knots may take a bit longer to resorb due to the increased amount of suture material left inside the wound. Always use absorbable sutures when using this technique.

Subcutaneous sutures

The subcutaneous suture is similar to the interrupted sutures with buried knots, but it is placed in the depth of the tissue in a surgical or traumatic wound. This suturing technique is primarily used to eliminate dead space in the depth of a wound. By default, always use absorbable sutures when using this technique

Figure-of-8 sutures

The (vertical) ‘Figure of 8 suture’ is a combination of a subcutaneous and a surface skin suture. Use this suture to save a bit of time when closing a long incision. In essence, it is a “combo-interrupted subcutaneous and skin closure suture.”

Step-by-step guide to placing simple sutures

Interrupted_sutures_suture_technique
How to Place an Interrupted Suture
Interrupted_sutures_with_buried_knots_suture_technique
How to Place an Interrupted Suture with Buried Knots
Subcutaneous_sutures_suturing-techniques
How to Place a Subcutaneous Suture
Figure_8_suture_technique
How to Place a Figure-of-8 Suture


Running (continuous) sutures

A running suture, also known as a continuous suture, consists of one strand of suture material that runs for a lengthy distance along a wound, normally in a zigzag pattern, which is tied at either end. This suture resembles those used on baseballs, and so, they are sometimes called baseball sutures. Running (continuous) sutures provide an adequate closure with even tension distribution as well as saving both time and suture material. This technique is commonly used when the wound is actively bleeding and saving time is critical, such as a scalp laceration. The disadvantage is that suture breaks can cause wound gaps to occur.

Use running sutures when esthetics are not important and when you want to save time. Running sutures tend to bunch-up the tissue and shorten the wound length due to the tension needed to keep the wound margins together. Use the running suture on an actively bleeding scalp wound when fast action is important to minimize blood loss. Since a wound of this nature is in the hairline, in most cases the cosmetic result is usually not critical.

Running sutures spread the suture tension evenly throughout the wound – and this may be important when working with tissue that has a soft consistency.

If the suture material breaks in a running suture, the whole wound will break down so be sure to secure the knots on the 2 sides and consider adding a couple of strategically placed interrupted sutures in addition to the running suture.

Continuous interlocking sutures

This suture technique is accomplished by passing the needle through the loop created by the previous suture, locking it into place. Continuous locking sutures are commonly used for breast reconstructions, intestinal surgeries, and hernias, where soft tissue requires secure stitching. The downside is when used externally on the skin permanent hatch marks may remain.

There is very little difference between regular running and interlocking running sutures. The latter tends to seal the wound margins better, which may be important in closing a wound between two cavities, e.g. closing the incision between the oral and nasal cavities following a Le Fort 1 osteotomy.

Subcuticular sutures

Apposition of the wound edge is easily achieved using the subcuticular continuous suture. Minimal scarring occurs because external sutures are not used. Rather, the subcuticular suture is applied under the epidermis using either an absorbable suture or a non-absorbable suture leaving external knots at the far ends of the laceration or incision so that the suture can be removed easily. When applied correctly, subcuticular continuous sutures provide the best outcome for cosmetic results. The drawback is that the procedure is extremely time-consuming. However, ,the sutures are easily removed, making it a common technique to use on children.

The subcuticular suture will allow for a very pleasing esthetic result in most cases, but it offers very little wound eversion by itself. Surgeons will have to get wound eversion by properly placing the subcutaneous sutures if they intend closing the surface with subcuticular sutures. One can either use absorbable or non-absorbable sutures when placing subcuticular sutures. If the choice is a thin Nylon suture remember to remove the suture within 5 days to avoid having to dissect out fragments of suture material from the semi-healed wound margin. When closing, strengthen the wound margins with Steri-Strips if needed.

Purse-string sutures

The purse-sting suture is a running suture used to close round defect wounds or openings. Predictably, the purse-string suture will not give a good cosmetic result because it will bunch-up the tissue. Purse-string sutures are typically used to close circular objects such as an areola or to close the opening after removing a chest drain (instruct the patient to take a deep breath and forcibly exhale against closed nose and lips). The suture material is passed in and out of the tissue as a running stitch and then drawn closed like closing a purse or a bag.

Step-by-step guide to placing running (continuous) sutures

Continuous (Running) Suture Suturing technique
How to Place Continuous (Running) Sutures
Continuous Interlocking Suture Suturing Technique
How to Place a Continuous Interlocking Suture
Subcuticular Suture Technique
How to Place a Subcuticular Suture

Mattress Sutures

The 3 main reasons for using mattress sutures:

To increase the interphase or contact between the raw surface areas of two opposing wound sides.
This reason is especially important when you want to optimize the time it takes for a wound to heal, especially when one closes a fistula, such as closing an oroantral fistula (an opening between the oral and maxillary sinus cavities).

To enhance eversion.
The mattress suture provides more eversion up to the point where you may get opening of the wound edges. You may consider using the far-near suturing technique which is a variation of the vertical mattress suture.

To bring more volume or quantity of tissue to the closure area.
With a mattress suture, the chances of dehiscence are significantly reduced. However, take care not to tie mattress sutures too tightly as doing so may cause tissue strangulation and result in necrosis of the tissue on the suture-tissue contact areas.

Horizontal mattress sutures

This suturing technique is used to create moderate tension to prevent hemostasis and to improve wound tension strength for better healing. The horizontal mattress is also effective at everting wound edges and provides fair approximation. However, care must be taken to not tighten excessively or tissue ischemia can result.

Vertical mattress sutures

The vertical mattress technique is an excellent choice for achieving wound edge eversion and approximation. The technique can be used on either thin or thick skin and utilizes two bites. The first bite approximates the wound edges and the second reduces edge tension. The downside is that vertical mattress sutures can only remain in place for 5-7 days or risk is high for permanent crosshatch marks.

Near and far sutures

Also called the far-near-near-far suture or the pulley suture, this is a variation of the vertical mattress suture favored by some surgeons.

The far-and-near suture is a modified vertical mattress stitch that uses the tension created by a pulley action to close wound tissue. Because the pulley stitch reduces the surface area of large wounds in which closure cannot be accomplished completely by traditional side-to-side sutures, it is an excellent technique for areas such as the legs and scalp. Pulley sutures can be used as temporary assisting stitches, such as lessening tension for buried sutures, or they can be left in for later removal. If pulley stitches are used they must be removed promptly in order to avoid crosshatch scarring.

Step-by-step guide to placing mattress sutures

Horizontal_mattress_suture_technique
How to Place a Horizontal Mattress Suture
vertical_mattress_suture_technique
How to Place a Vertical Mattress Suture
far_and_near_suture_technique
How to Place Far and Near Sutures

Other suturing techniques

Ligature Sutures

This technique is used to suture tubular structures such as blood vessels in order to stop bleeding or reestablish blood flow.

Horizontal Continuous Mattress Sutures

Certain anatomical areas like the retroauricular skin, are prone to wound inversion, and this is an indication for placing horizontal continuous mattress sutures.

Horizontal Half Buried Mattress or 3-Corner Sutures

The horizontal half-buried mattress, or 3-corner suture, is used to close flapped or V-shaped wound edges. This technique is also used to better approximate edges of skin of varying texture or thickness. Also, tissue ischemia is reduced by using the 3-corner suture.

Relaxation Sutures

This suture technique is used when a wound is expected to create excessive tension. A relaxation suture allows for loosening in order to relieve such tension.

Quilting Sutures

This technique is effective at reducing the formation of seroma (swelling or lump in the underlying tissue due to serum accumulation in a localized area). A flap of skin is sutured using multiple stitches to the underlying tendinous expansion sheet (aponeurosis) that normally connects muscle tissue with its movable parts.

Retention Sutures

This technique is used to provide strong reinforcement of deep muscle and fasciae in the wall of the abdomen. Retention sutures lessen tension on the primary suture so that wound disruption is limited. The downside is that retention sutures often cause pain and severe discomfort to patients. According to one study, up to 50 percent of patients receiving retention sutures require premature removal due to complaints of pain.

Frost Sutures

This suturing technique is used during surgeries of the eyelid. Frost sutures prevent the eyelid (mainly the lower eyelid) from turning outward, known as ectropion.

Double-arm Sutures or Cobbler’s Sutures

This technique is preferred by some eye surgeons that desire to vertically or horizontally resect the rectus muscles. The double-arm suture is achieved by using a suture containing a needle at each end.

Gély’s Sutures

Similar to the double-arm suture, Gély’s suture uses suture material with a needle at both ends to close intestinal wounds. It is performed using a continuous stitch.

Czerny’s Sutures

There are two uses for Czerny’s sutures. The first involves suturing only the mucous membrane of the intestines. The second splits ruptured tendon ends and sutures the other end into the created slit much like a male/female coupling design.

Lembert Sutures

The Lembert suture is another technique used in gastrointestinal surgeries. It can be applied as either an interrupted or continuous suture that repairs the collagenous submucosal layer without disturbing the lumen.

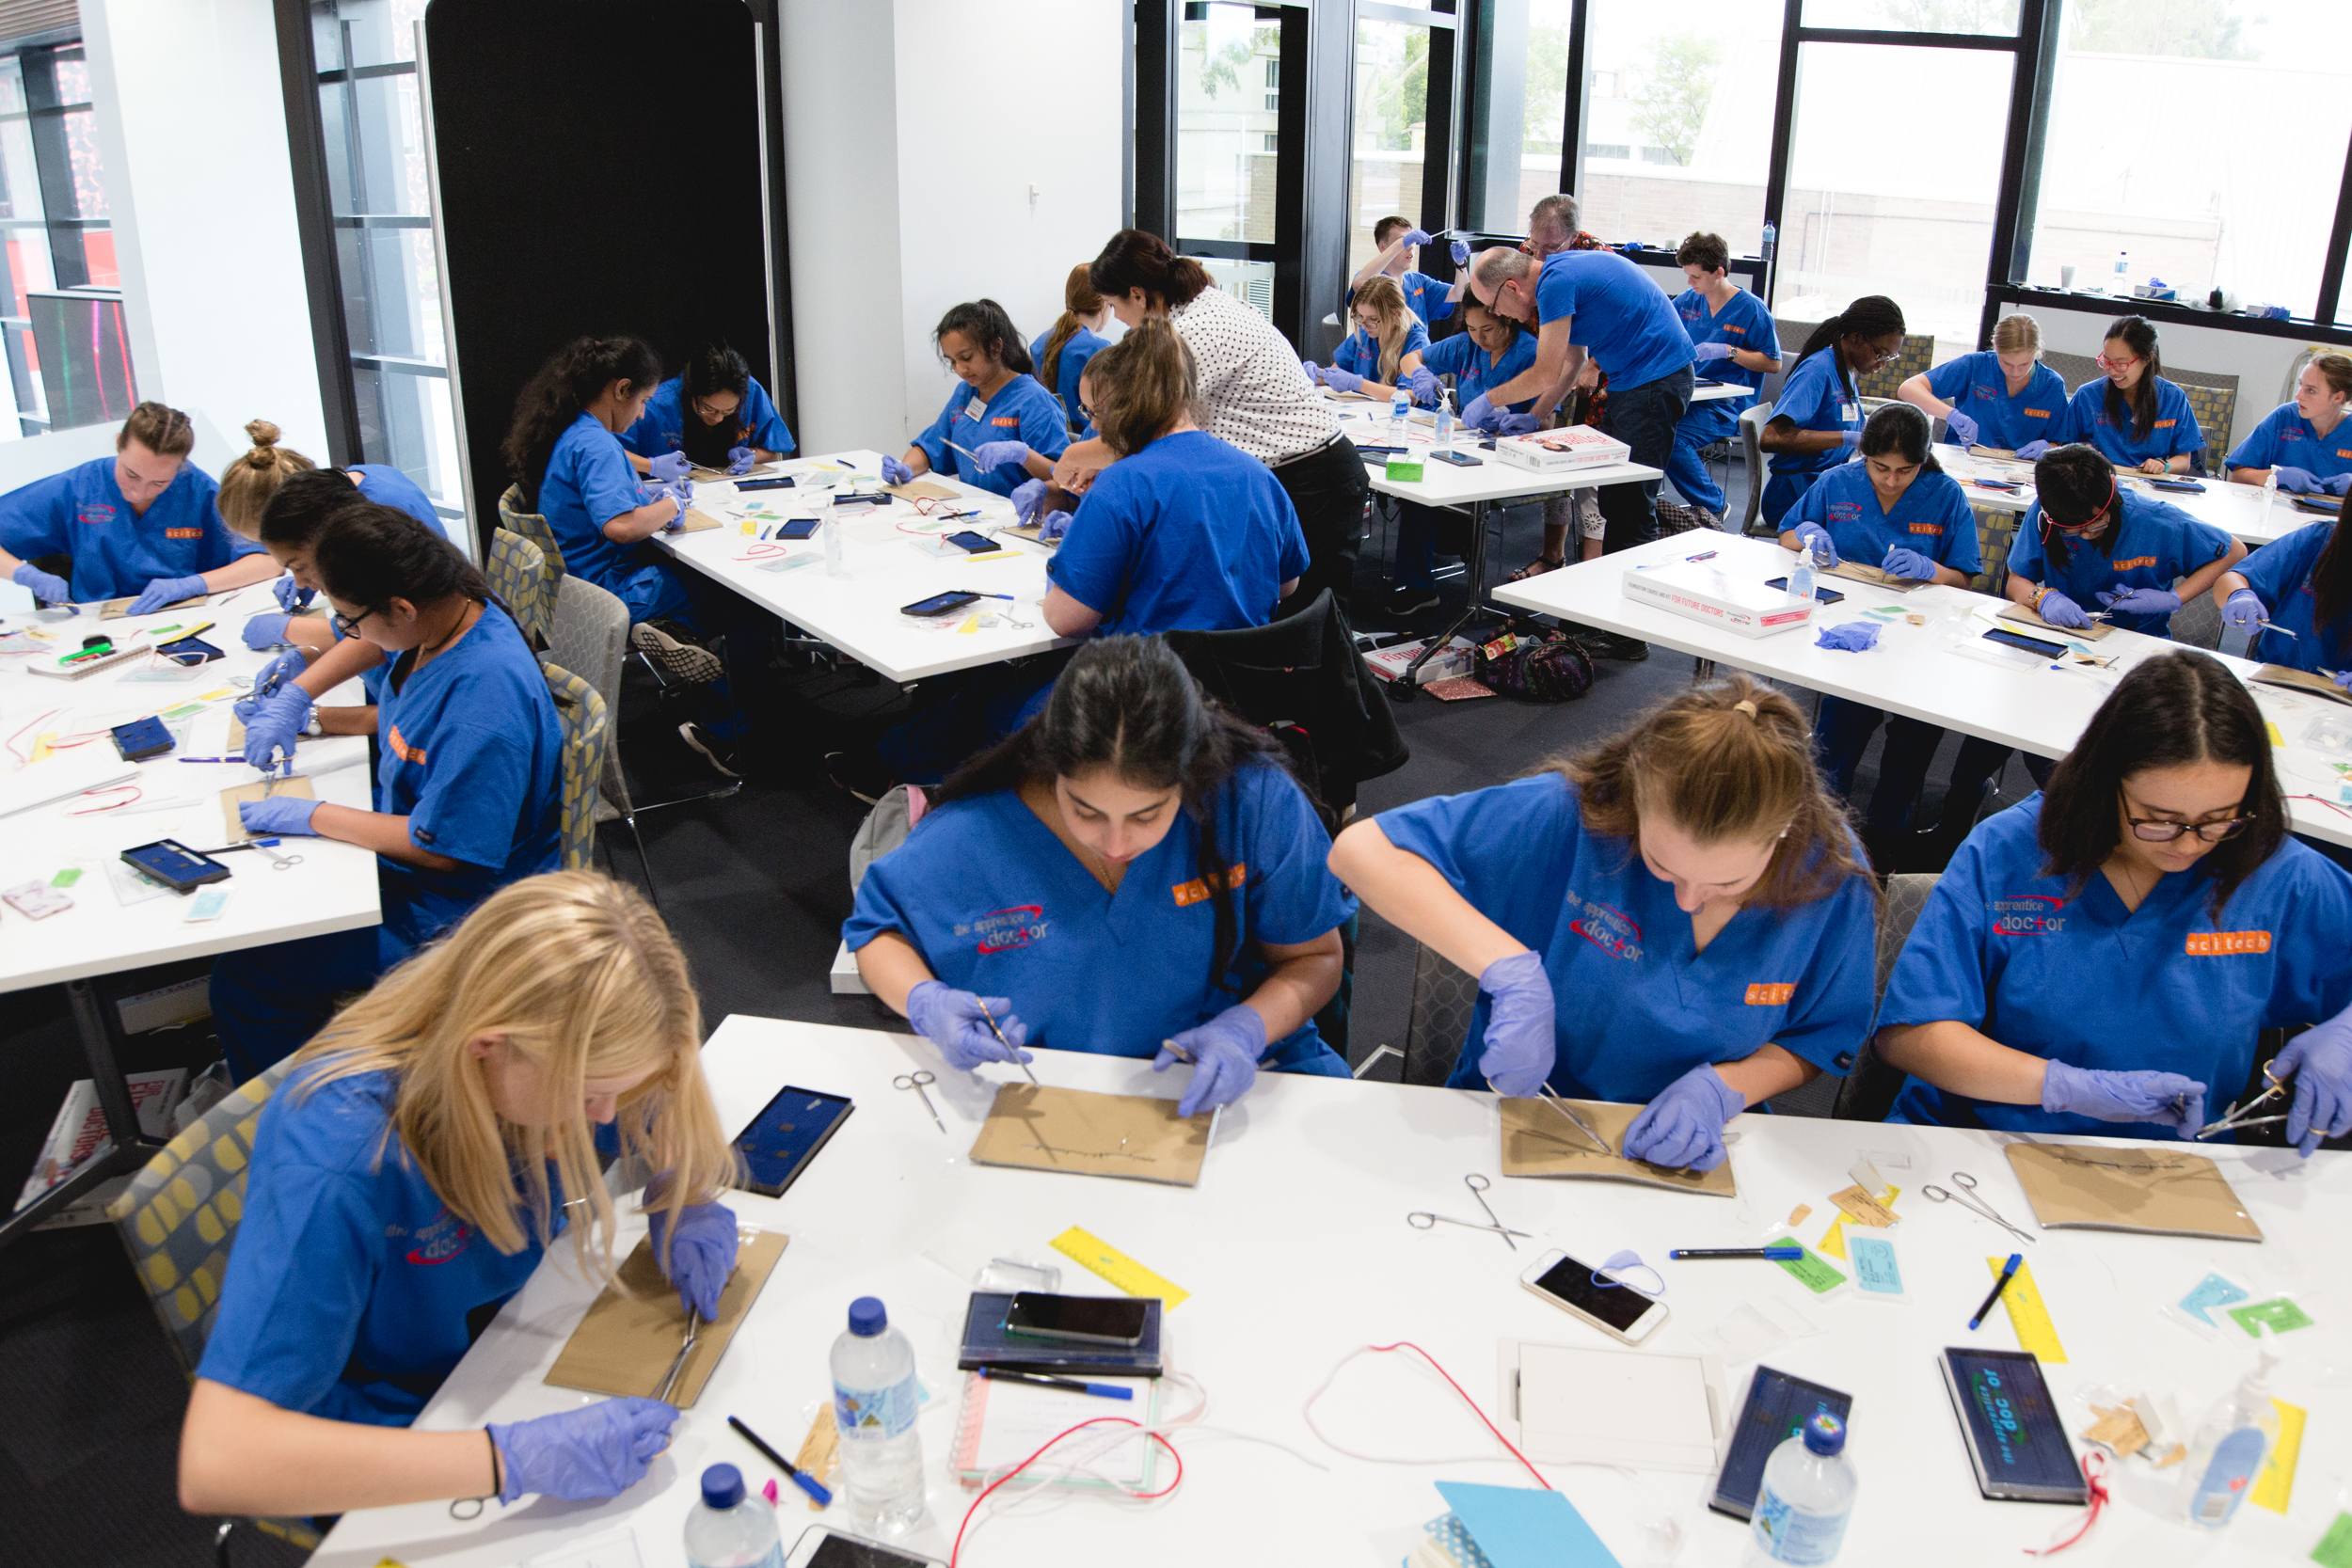
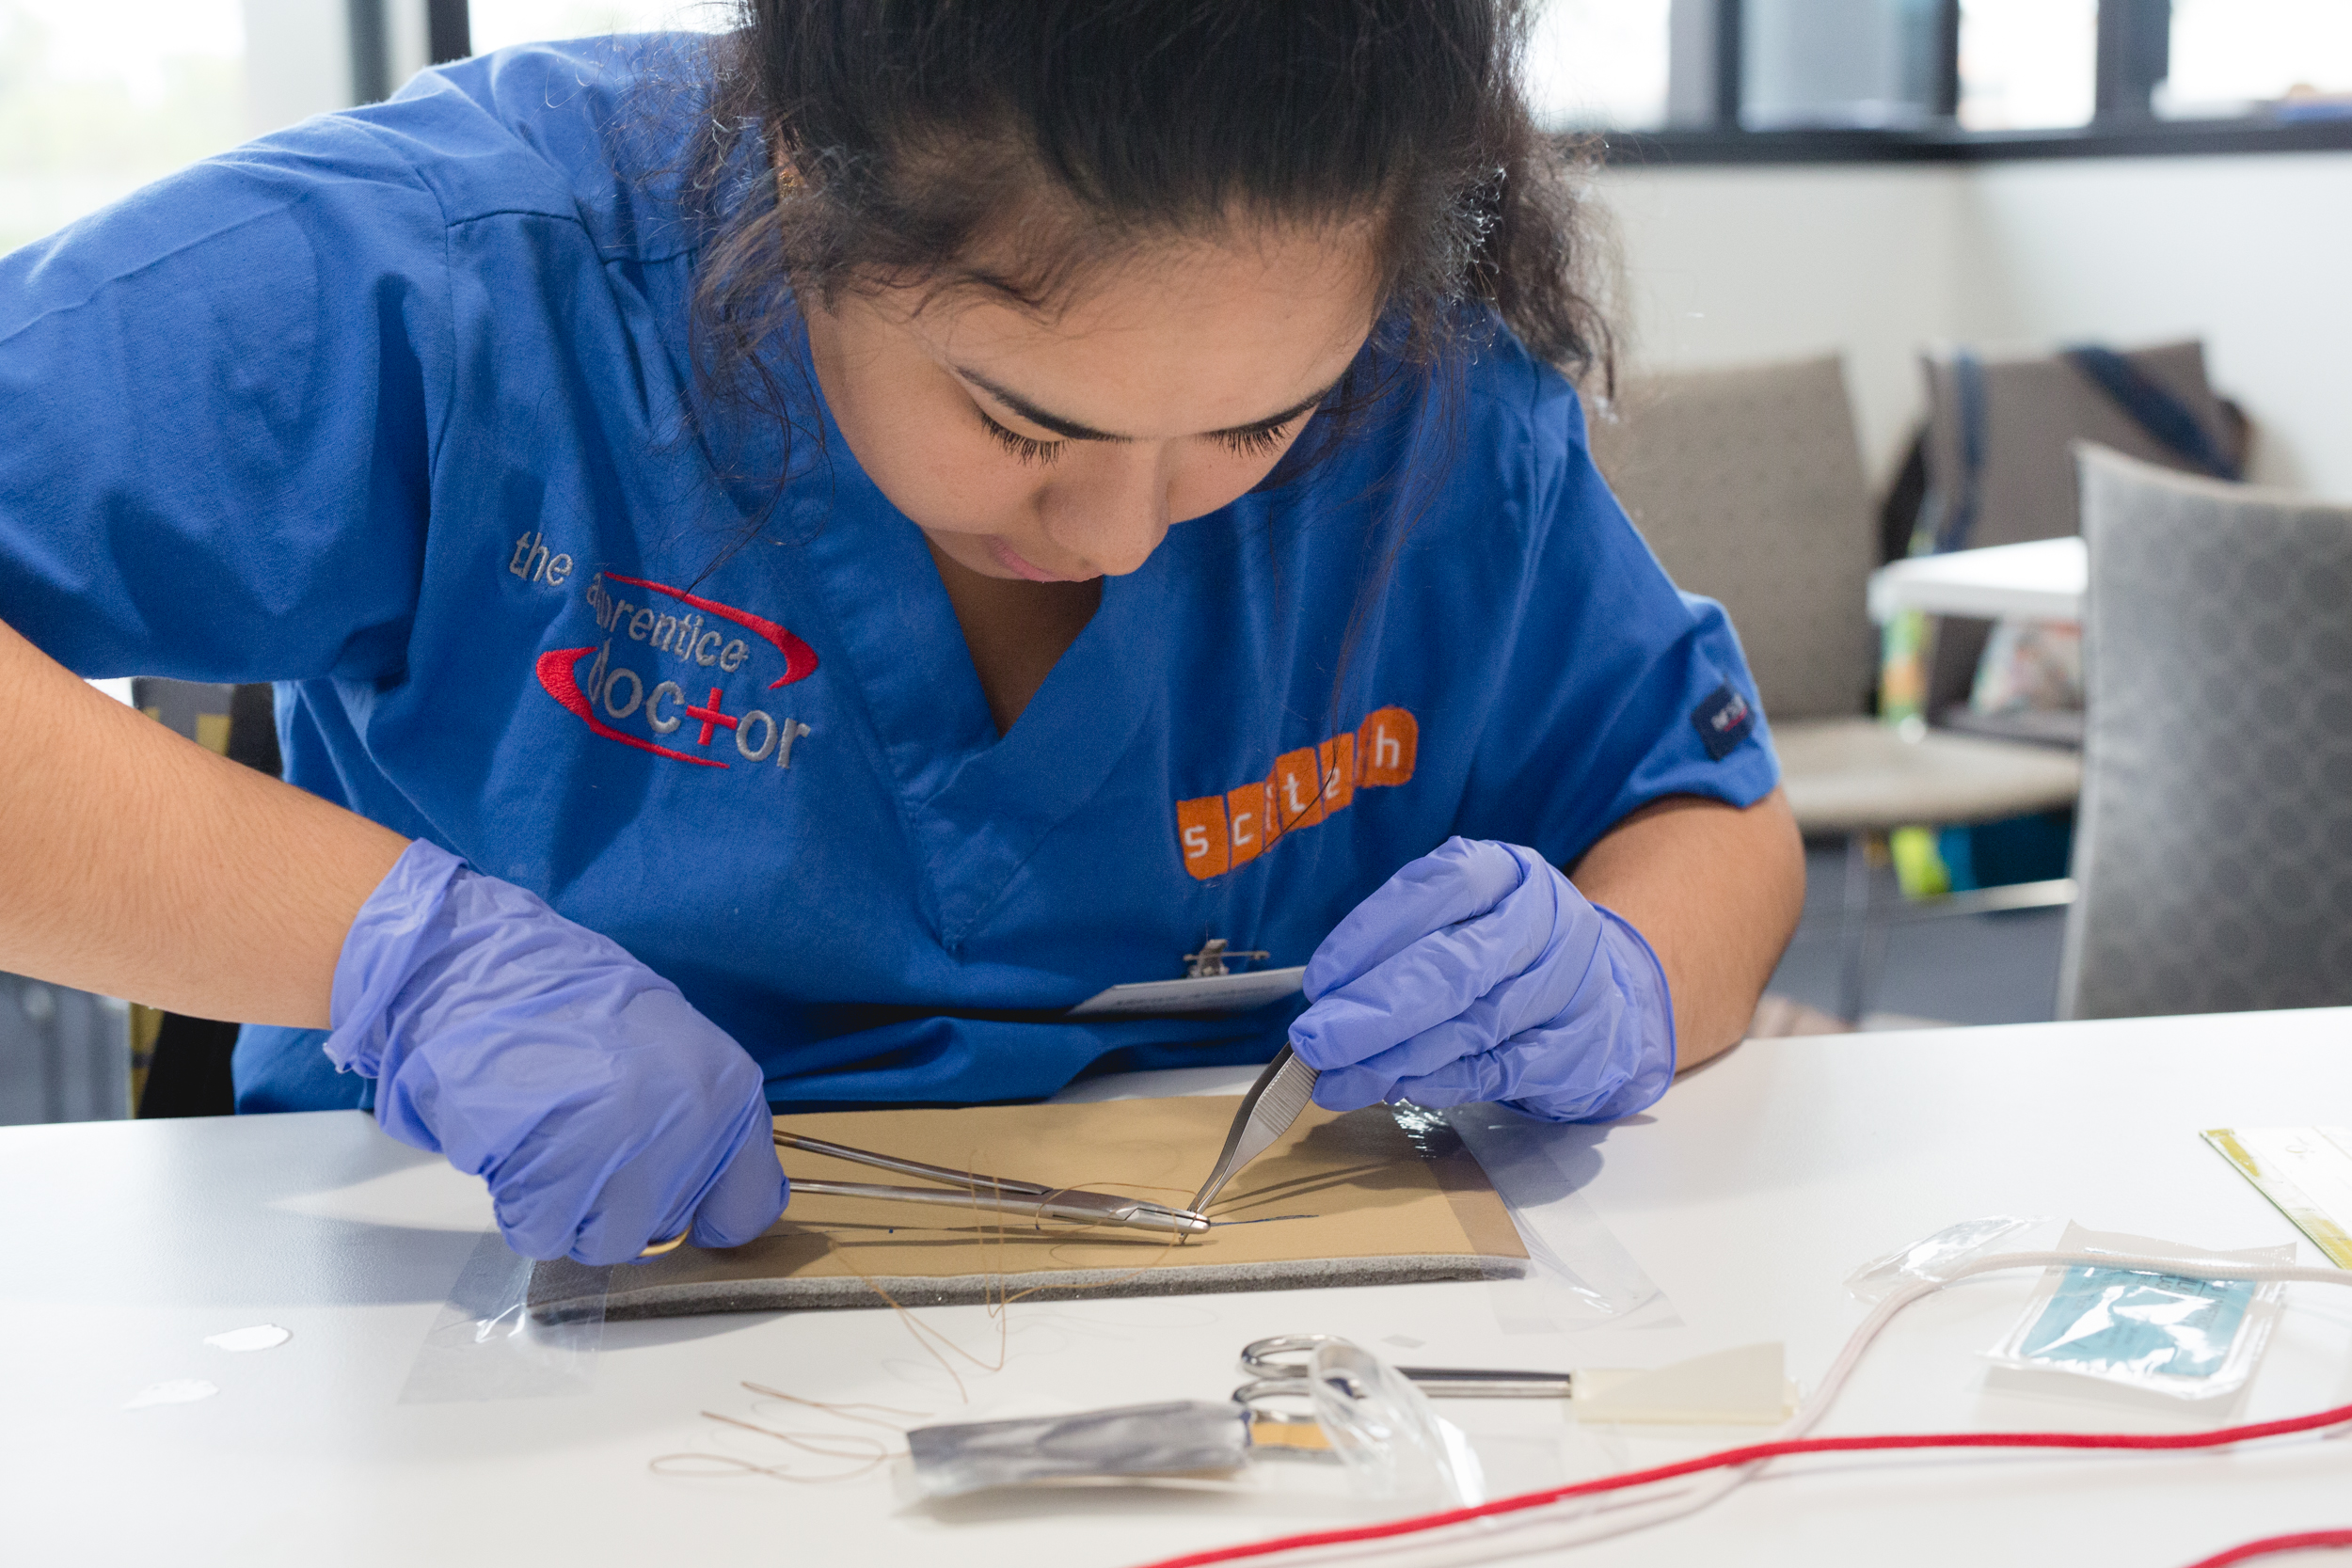
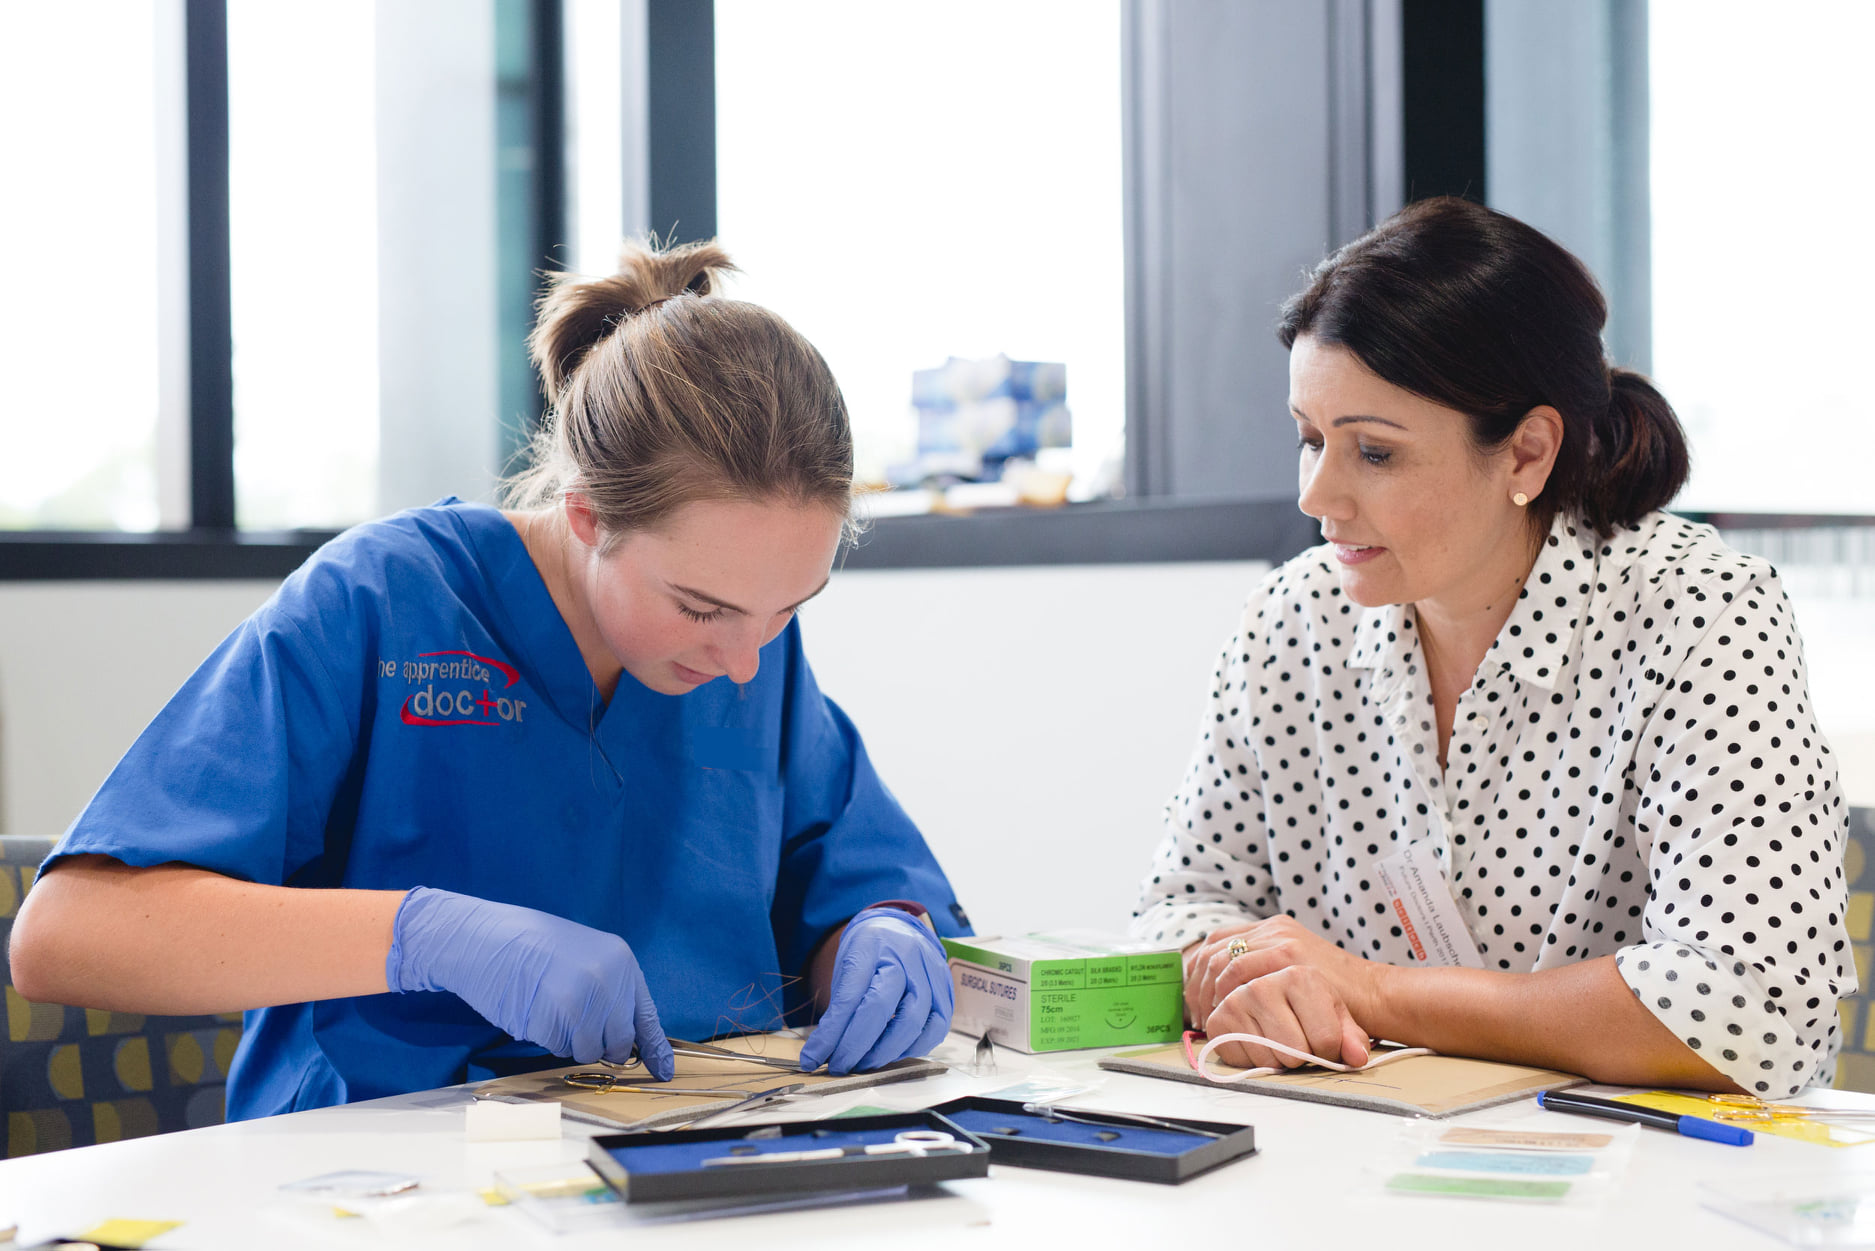
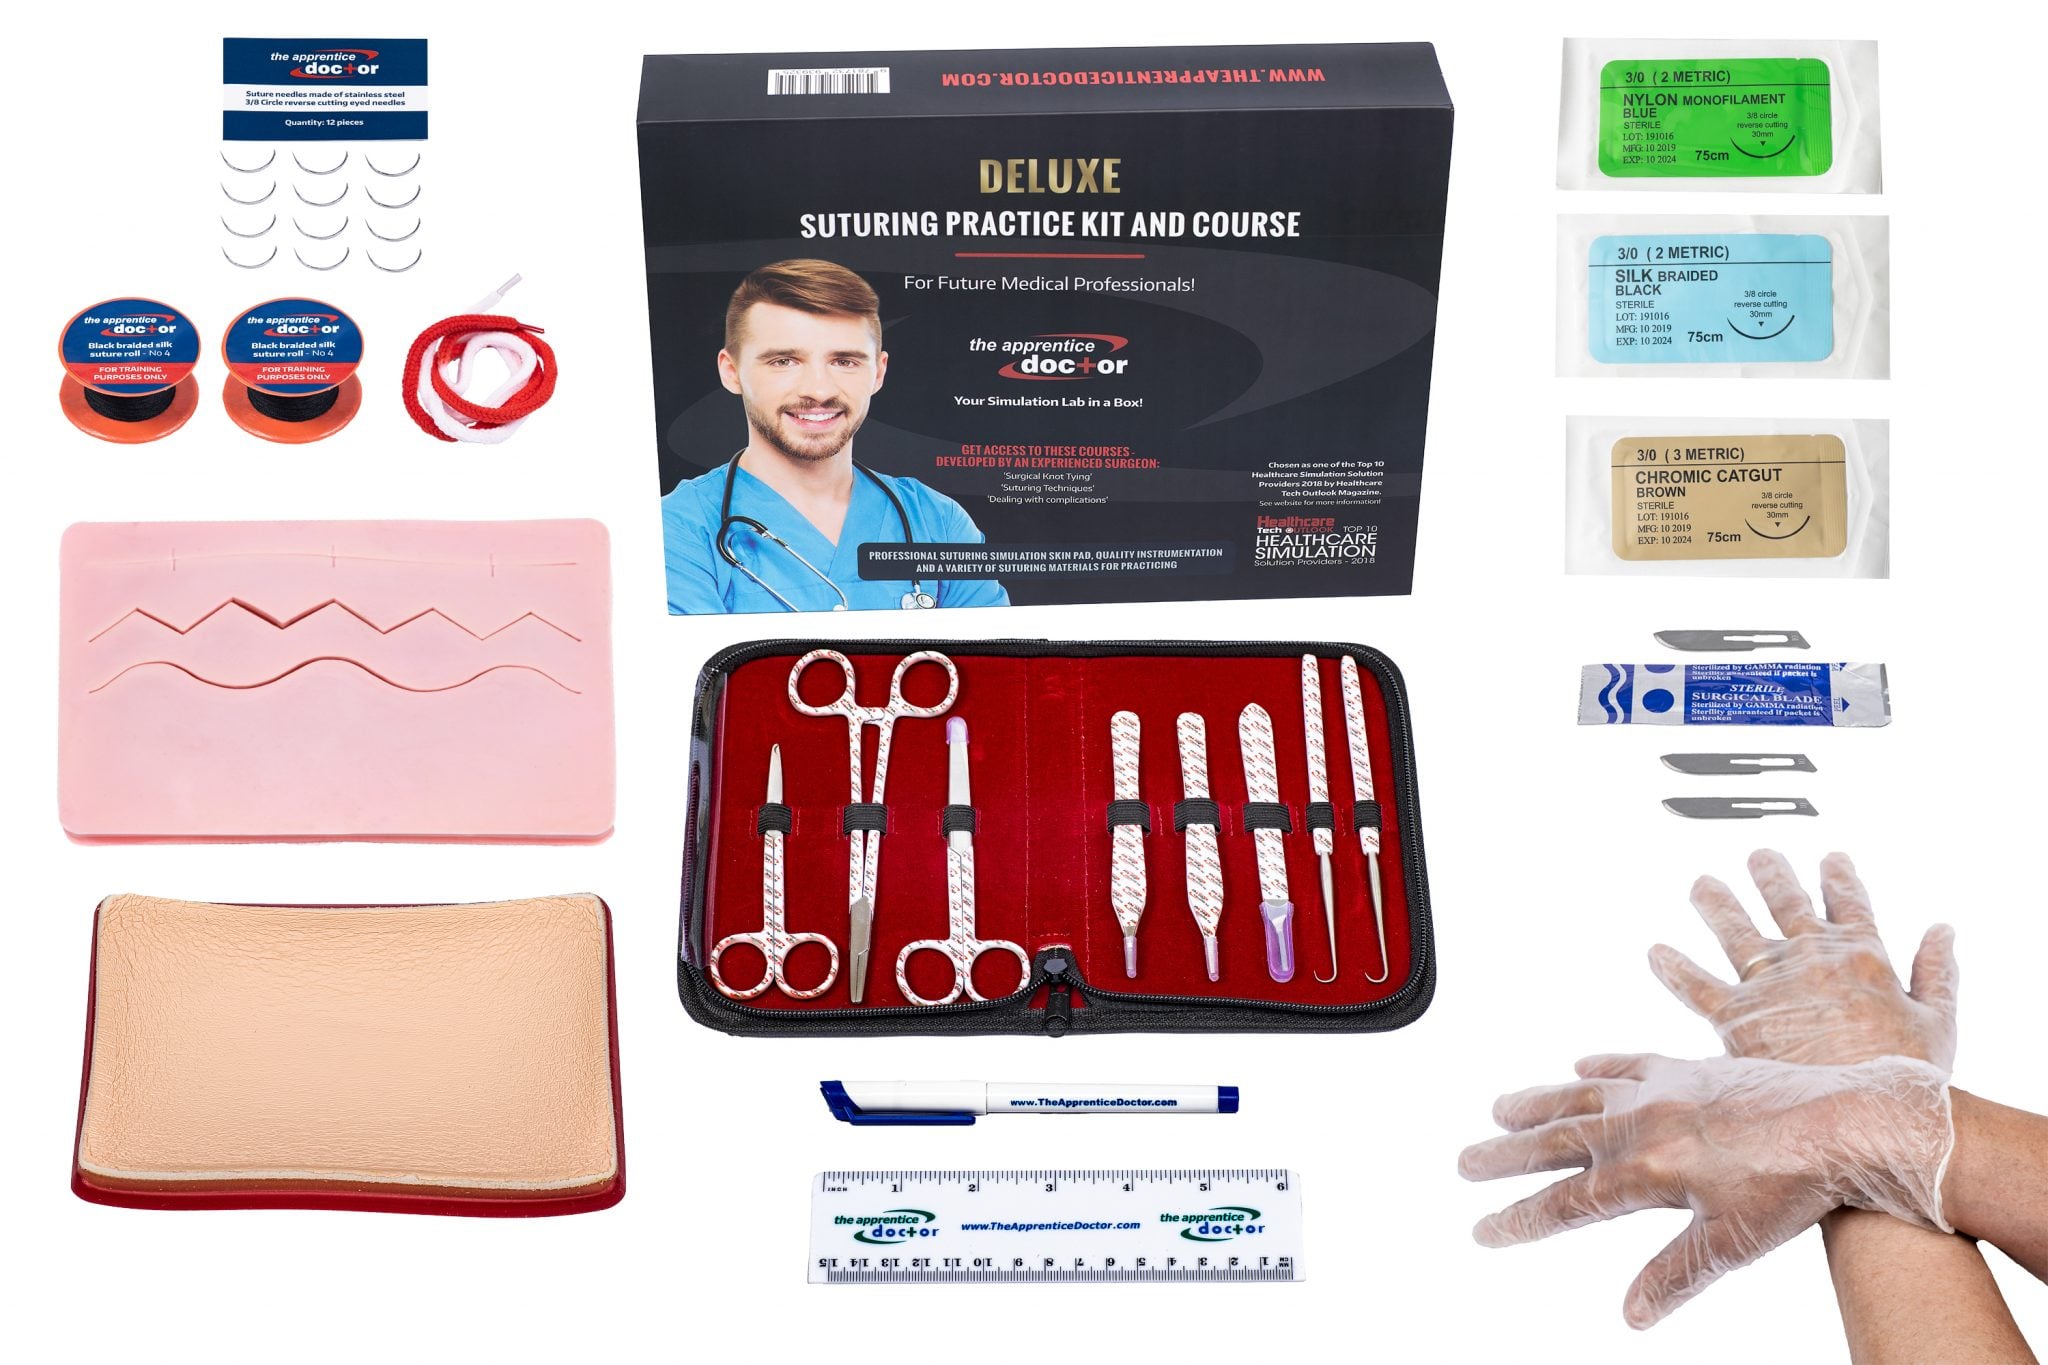
Master Suturing Techniques Through The Apprentice Doctor!

There is no need to wait on getting practice with suturing. Before you step into any situation requiring suturing, even an emergency in your own home, you can perfect your suturing skills. The Apprentice Doctor® Deluxe Suture Kit & Online Training Course teaches you how to confidently close wounds. Begin training today!


Surgical Suturing Techniques Mastery Guide (Article written by Dr Anton Scheepers who is a Maxillofacial and Oral Surgeon and founder of The Apprentice Doctor)


I really want to become a Doctor – Is there anything I can do straight away?

Check out the How to Suture Wounds on Apprentice Doctor Academy.

Also, explore the Deluxe Suture Kit on Apprentice Doctor Kits.

The Suturing Instruments Used in Wound Management

The objectives of managing a wound by suturing are obvious and simple. The first is to avoid infection from taking root in the wound. The second is to help in stopping bleeding through the wound. A third is to provide a visually pleasing scar as opposed to a grotesque mass of tissue.

Many case studies now focus on the aesthetic nature of the actual healing process of a wound rather than the probability of infection. This is because generally speaking the rate of infection is low regardless of the technique used.

Although the basic techniques and principles related to tissue repair haven’t changed much in the last century, various options are available to make the overall operation a therapeutic experience.

With the extensive study done in this field, medical practitioners have now developed topical anesthetics, tissue adhesives, and fast absorbing suturing material highly responsible for ensuring little to no amount of trauma for the patient.

The use of sedation during the procedure, especially for difficult cuts, or for an anxious patient, has made suturing easy to tolerate for the family, the physician, and the patient.

A Well-Equipped Suturing Kit is important for optimal suturing. It’s paramount to have the best quality instruments, which are the exact size for the location and nature of the wound that is being closed. The risk of infection is further decreased if the wound is handled carefully, and the instruments sterilized in the correct manner.

 A basic suturing kit includes the following:

  • A needle holder.
  • Toothed forceps, with a hook to handle tissue.
  • Fine suturing scissors.
  • The appropriate suturing material.

It’s very important to consider the suturing material that is used when performing the operation. In turn, choosing the right suturing material is made easy by considering the location and tension of the wound. Other equally important factors to consider about are the tensile and knot strength, handling of the wound, and tissue reactivity.

Suture materials are generally of the following two types:

  • Absorbable – This type of material is generally used for buried sutures that don’t require removal. They lose their tensile strength in less than 2 months and thus are highly absorbable.
  • Non-absorbable – This type of material maintains the majority of tensile strength even after 2 months. It is non-absorbable and therefore used to close wounds on the skin’s surface and requires removal.

The needles used for suturing are made exclusively for such a purpose, and comes in a variety of shapes and sizes for a specific wound. Curved needles for example, are only used on dermatological surgery.

Needles are divided into two basic types:

  • Cutting Needles – As their name suggests, these triangular cross-sectioned needles cut away at the tissue they are placed against. Less force is therefore required to pass the needle but it can leave small puncture wounds in place. They are generally preferred for suturing of the skin’s surface.
  • Non-cutting Needles – These are more rounded in the cross section, and are used to push tissue aside and to close it around the suture. More force is used to operate as compared to cutting needles, and is therefore used for organ repair and subcutaneous closure.

You can read more on suturing techniques here.

Suturing Course and Kit course from The Apprentice Doctor!

There is no need to wait on getting practice with suturing. Before you step into any situation requiring suturing, even an emergency in your own home, you can perfect your suturing skills. The Apprentice Doctor® Deluxe Suture Kit & Online Training Course teaches you how to confidently close wounds. Begin training today!


I really want to become a Doctor – Is there anything I can do straight away?

Check out the How to Suture Wounds on Apprentice Doctor Academy.

Also, explore the Suture Kit (Right-handed) on Apprentice Doctor Kits.


Surgical Knots Used in Wound Suturing

As a general rule, wounds are either closed secondarily or primarily.
 
Primary wound closure is one that is operated upon the wound within a short time of its occurrence. The suturing takes little cleaning and preparation which is probably why this type is more popular when it comes to wound suturing.
 
Secondary wound closure is one that is used to suture the wound which hasn’t been closed properly, or there has been a delay in its closure for up to a couple of days since the occurrence of the wound. This is a more complicated procedure to carry out as these wounds have to be meticulously cleaned first.
 
Primary or secondary; which to choose and when

Wounds that are 6 to 14 hours old can be closed using the primary method but only if the wound is not infected. If it is, the wound must be cleaned and treated to remove any traces of an infection before any suturing is performed.
 
On the other hand, wounds that are at 14 hours old or more shouldn’t be closed primarily.
 
Do not use the primary method if any of the following conditions are present:

  • Reddening around the wound is spreading.
  • Discharge of pus from the wound.
  • A constant high temperature.
  • A mass of soft gaping tissue.

Clearing the wound requires 3 to 7 days of aseptic care along with warm dressings and irrigations. Only then, should secondary wound closure be attempted.

Surgical knots used in suturing

The most important part of a good suturing technique is whether the knot tying method of the suture is correct or not. Different types of knots are used for different types of wounds.
 
Square Knot – One-Hand Technique: A two-hand technique is often used to tie the square knot; however on some occasions it’s not the right technique. In those moments the one-hand square knot technique is used, either the left hand or the right.
 
Square Knot – Two-Hand Technique: This technique used for closing wounds is the considered the easiest and most reliable when it comes to using most suture materials for tying. The same technique can be used with surgical gut, surgical cotton, virgin silk, and surgical stainless steel.
 
Deep tie knot: Tying up a suture in a deep body cavity can be difficult and requires a more complex type of knot. In order to stay tied up, the square knot must be firmly snuggled down. However the operator must perform the suture in a way that avoids upward tension of the suture or else the delicate tissue might tear.
 
Instrument tie: This knot tying technique is particularly useful if/when the ends of both the suture material are short. To get the best results, proceed with caution when using the needle holder, especially when the suture is of a synthetic absorbable type or any other monofilament suture since repeated bending can cause the sutures to break.

You can read more on suturing techniques here.

Suturing Course and Kit course from The Apprentice Doctor!

There is no need to wait on getting practice with suturing. Before you step into any situation requiring suturing, even an emergency in your own home, you can perfect your suturing skills. The Apprentice Doctor® Suture Kit & Suturing Training Course teaches you how to confidently close wounds. Begin training today!


What do you think? Leave us a comment below.

I really want to become a Doctor – Is there anything I can do straight away?

Check out the How to Suture Wounds on Apprentice Doctor Academy.

Also, explore the Deluxe Suture Kit on Apprentice Doctor Kits.


A Comparison of the Different Suturing Needles Available Today

suturing needles

In wound suturing, once the type of needle is selected in performing a surgical procedure, the type of suturing needles is most important. The factors that are considered for the selection of the needle are the size and the purpose, such as sifting through tissue or mending it straight away.

For example, tapered needles are generally used inside the body. Bowels, muscles, or fascia places contain tissue that’s easily accessible and therefore pierced just as easily. Cutting needles, on the other hand, are used for very rough tissue ligaments and skin.

As already noted, the appropriate size of the surgical needle is very important. There are many different sizes and sub-types of needles that are more commonly used for performing wound suturing, and other surgical procedures.

Tapered Suturing Needles

Tapered suturing needles are also called round bodied needles due to their shape and blunt point. Each one is tapered and doesn’t have a cutting edge; therefore, they are generally used for closing soft tissue such as gastrointestinal, vascular, fascia, and other soft tissue found below the skin’s surface.

This type of needle is specially designed for separating tissue fibers rather than cutting them. After inserting the needle, the tissue closes tightly around the suture material, which in turn forms a sort of leak-proof barrier which prevents outside contaminants from entering the wound.

Different wire diameters are used in every round-bodied needle that is manufactured. Each is made according to the type of tissue and wound to be sutured. For example, fine wire diameters are used to repair bowel tissues, whereas a heavier wire diameter is used for suturing muscle.

  • TP (trigger point): Used to close fascia during abdominal surgery.
  • CT (circle taper): Used to close the joint space or deep layers of tissue after general surgery.
  • CT2 (smaller than CT): Often used on closing of uterus.
  • SH (small half circle): Used to close bowel or tissue layers after breast surgery.
  • CV: Used for nerve repair and delicate vessels.

Cutting Suturing Needles

These types of suturing needles are used for general closure of skin, subcutaneous tissue, etc, and are sometimes used for ophthalmic and plastic surgery. The point of the needle is triangular and contains a cutting edge. Other than the conventional cutting needle, most surgeons prefer its sub-type, the reverse cutting needle, except when working with tough tissue. The difference between the two is the cutting edge. The edge of a conventional needle is on the inner curvature. The edge of a reverse cutting needle is located on the outer curvature.

Cutting suturing needle types are:

  • FSLX (for skin/FS extra large): Used for large skin closure, when a lot of tension is present.
  • FSL (for skin large): Used for the procedures that need a higher tension closure.
  • FS2 (smaller than FS1): Used for common closing of skin.
  • P3: Used for closing of small incisions, such as in facial reconstructive surgery and hand surgery.

You can read more on suturing techniques here.

suturing kitLearn suturing techniques as part of your medical education, or even personal preparation should you run across an emergency and get to medical personnel. You can use The Apprentice Doctor’s Deluxe Suture Kit & Online Training Course in the privacy of your own home. Practice using high quality suturing instruments on a silicone suture skin model. It’s the ideal kit for student doctors, nurses, and survivalists and preppers.


I really want to become a Doctor – Is there anything I can do straight away?

Check out the How to Suture Wounds on Apprentice Doctor Academy.

Also, explore the Deluxe Suture Kit on Apprentice Doctor Kits.


Overview of Suturing

More commonly known as stitches, a surgical suture is a device used to knit back together body tissues after a surgery done on a person, or because of an injury. The device that is used to do this procedure consists of a needle, and an appropriate length of thread attached to it.


The Attachments of a Suturing Device

The most important attachments of a suturing device are the needle and thread. Over the years, a number of different materials, both natural and artificial, have been used to make the threads. Similarly, the needles used primarily for suturing purposes have evolved from a number of different shapes and sizes to what we are used to today.


Eyed needles – These needles can be re-used. The eyes of the needle are supplied separately from their suture thread, and must be prepared on site for operations. Any thread and needle combination can be attempted with good results with this needle.


Atraumatic needles – Or swaged sutures that come with a pre-packed eyeless needle that is attached to a specific length of thread. This suturing device comprises of an eyeless atraumatic needle swaged or molded by the manufacturer, and comes pre-packaged with a specific length of thread.


The advantage of this type of suturing needle is that unnecessary time is not needed to thread the suture material on the needle.


There are various other types and sizes of surgical needles with which different wound cuts are operated and closed. They include:

  • Straight edged needle
  • Compound curve needle
  • Half curved at both ends of a straight segment (also known as a canoe needle)
  • Half curved or ski needle
  • Spiral needles


The Techniques Used For Suturing

Suturing is a method by which wounds that are related to injury or surgery done on a person are closed, and the technique used to do this is nearly 1000 years old.


The only change came with the materials used for suturing and the different aspects of the technique; however, the primary reason for performing such an operation has remained the same and that is:

  • To close dead space
  • To give support and strength to the wound, until natural process of healing kicks in
  • To present the wound for an aesthetical and a functional end result
  • To minimize the risk of bleeding and infection


Factors Contributing To Aesthetic Wound Suturing

Gentle handling of the scarred tissue is very important for increasing healing capability of the wound. The post-operation appearance of the wound should consist of a flawlessly designed flap, with crossed and zigzagged sutures over the wound, placed with a meticulous and steady hand.
However, if the incorrect suture technique is used to close the wound, or the execution is poor the end result will come out to be grossly disfigured.


You can read more on suturing techniques here.


What do you think? Leave us a comment below.

I really want to become a Doctor – Is there anything I can do straight away?

Check out the How to Suture Wounds on Apprentice Doctor Academy.

Also, explore the Suture Kit (Right-handed) on Apprentice Doctor Kits.


A Historical Glimpse of Suturing

Suturing is commonly used today as a means by which wounds are closed in order to prevent infection and hasten healing. Stitches are used by surgeons, doctors, nurses, podiatrists, dentists, first aid workers, veterinarians and survivalists. However, where did the concept for suturing wounds begin?


Archeologists have discovered primitive needles of bone and later metal that were thought to be used for surgical suturing thousands of years ago. It is suggested that the original versions of suture threads were coarse and made from plant fibers before progressing to animal parts much later in history. The first obvious proof of using sutures surgically comes from the Egyptians who used the technique extensively for burial preparation of their mummies. It is assumed that they also used their suturing skills on living people as well. The Greek physician Hippocrates recorded his use of sutures and plant-based materials, but the crude methods and materials most assuredly led to infections and severe scarring during that time of use.


Although the exact date of the transition from plant fibers to animal suturing materials is unknown, the first recorded use of catgut as a suturing material is attributed to Galen of Pergamon in the second century AD. Catgut was and still is made from cattle and sheep intestines, although synthetic catgut is more commonly used today, but like its predecessor, does not require removal because it dissolves in the body.


One of the main problems with suturing surgical incisions and wounds early on was that sterile instruments were not used which often led to skin irritations and infections. In 1860, Joseph Lister addressed the problem by creating a method of for sterilizing suture material by using carbolic acid. Chromic acid was later used to achieve sterilization and then iodine was introduced to sterilize catgut in 1902. These substances greatly decreased the incidents of infection in sutured wounds.


Sterilized catgut has been successfully used for decades and is still in use today. Eventually, however, doctors began to seek other suture options because catgut dissolved unpredictably in different patients which sometimes led to wounds reopening. Scarring was also a major problem with catgut sutures. Synthetic suture materials were produced in the 1920’s and the 1930s saw the creation of two types of surgical sutures, absorbable and non-absorbable which offered doctors a broader choice in suturing materials.


Today, most suture kits contain suture thread made from polymer fiber materials which work well for a variety of surgical suturing procedures. Polymer fiber suture thread comes in a wide selection of styles, designs and types which can be utilized for various wounds and under numerous conditions. Due to its flexible nature, polymer fiber is the preferred choice of physicians, nurses, dentists, veterinarians and first responders and is the best selection for survivalists, adventurers, sports teams and high-risk job workers. Suturing has come a long way since its conception and suture kits offered today contain top sterile equipment and materials to perform wound stitching properly which significantly reduces both infection and scarring.


You can read more on suturing techniques here.


What do you think? Leave us a comment below.

I really want to become a Doctor – Is there anything I can do straight away?

Check out the How to Suture Wounds on Apprentice Doctor Academy.

Also, explore the Suture Kit (Right-handed) on Apprentice Doctor Kits.


Common Suture Techniques

There are several common suture techniques which can be used to close wounds. The first requirement is to possess a suture kit that includes, at least, the basic tools of a needle holder, toothed tissue forceps (with or without a skin hook), fine suture scissors and adequate suturing material.


Two types of suture material should be available and used depending on the type of wound. Absorbable suture material is normally used for deep tissue wound stitching (buried sutures). It loses its tensile strength in less than 2 months and does not need to be removed. Non-absorbable suture material maintains its tensile strength longer and is normally used for stitching skin wounds. This type of suture material must be removed once the wound has healed.


Various Common Suture Techniques

Simple Interrupted Method – This suture technique provides a better result cosmetically due to a greater eversion of the wound edge that produces a thinner, less visible scar. Stabilize the edge of the wound with either a skin hook or toothed forceps and enter the suturing needle perpendicularly from three to five millimeters away from the edge of the wound. Tie a knot and repeat. Take care not to utilize a flat angle as less eversion is produced and greater scarring will occur.


Continuous Method – A continuous suturing technique is much faster than the simple interrupted method. However, it is a weaker suture that also tends to strangle the affected area’s blood supply. The same suture technique is used to begin as is used for the simple interrupted method. However, instead of cutting and tying the suture, it is brought across the cut diagonally where the needle is again introduced in a perpendicular manner. The suture is tied by forming a loop at the end and the needle passed through.


Horizontal Mattress Method – The horizontal mattress suture is commonly used to provide necessary tension for large wound closure. However, this suture risks dermal blood supply strangulation which can lead to necrosis. The needle is entered between five and ten millimeters from the edge of the wound, crosses the wound and exits on the opposite side where the needle is reintroduced (on the same side) between three and five millimeters from the exit point and repeated.


Vertical Mattress Method – This technique provides superior eversion of the wound edge over the horizontal mattress suture. The vertical mattress stitch offers excellent support and minimizes dead space. Introduce the needle between five and ten millimeters from the edge of the wound ensuring a deep amount of tissue is achieved. Then exit the skin on the opposite side, reverse needle position and reenter the skin from one to three millimeters to the side and, again, take a deep bite of tissue when repeating to side one. Secure with a knot at the end.


Buried Method – Large, gaping wounds require suturing in the dermis layer of the skin in order to close dead space. The buried suture technique is used to accomplish this, providing extended support during healing as well as an improved cosmetic result. Use a skin hook to evert the edge of the wound. Using absorbable suture thread, enter the needle in the subcutaneous tissue and exit through the dermal tissue on the same side. Reenter the needle through the dermal level on the opposite side of the wound and exit through the subcutaneous tissue. Tie a knot deep ensuring it has short ends and repeat for the next stitch.


You can read more on suture techniques here.


What do you think? Leave us a comment below.

I really want to become a Doctor – Is there anything I can do straight away?

Check out the How to Suture Wounds on Apprentice Doctor Academy.

Also, explore the Deluxe Suture Kit on Apprentice Doctor Kits.


Suturing Wounds in an Emergency Situation

Injuries can occur at odd times and in inconvenient locations causing a delay in accessing proper treatment by medical professionals. Accidents can occur while hiking, camping, working in remote locations, or traveling in other countries that are less prepared to handle emergencies or access medical help. In such times, it is beneficial to be both prepared and have a basic knowledge of how to stitch up wounds.


Ethics and Legalities of Suturing Wounds

In the United States, most laws governing suturing require that it either be completed by a medical professional with the proper training or by someone directly under the supervision of such a person.


However, the specifics of legalities differ slightly according to individual states so laws should be researched in the particular states in question. Good Samaritan laws also exist in some form in most U.S. states. Such laws are designed to reduce the hesitation of bystanders that witness an accident and encourage action to provide lifesaving treatment to injured parties. Basically, the Good Samaritan laws outline that no legal repercussions can occur to those who provide aid out of the goodness of their heart and within their present knowledge.


Besides the legal aspect of suturing, there are ethical considerations. Suturing, if not done properly, can cause healing complications that lead to such incidents as ruptured wounds (dehiscence), wide scars, or painful scars that contain blood vessels and nerves (hypertrophic). This can leave the treated person disfigured or in pain for an extended period of time.


Of course, in an emergency situation where medical help may be days away, the issue of treating someone who has suffered a major injury that requires suturing is more about survival than legalities or ethical considerations. However, it is still important and responsible to glean as much information on suturing products and techniques as possible so that the best effort is applied should the need arise.


Determining If a Wound Requires Suturing

Not all injuries require suturing. Some wounds are minor and only require cleaning and covering with gauze or a Band-Aid. Others are massive and should be packed and wrapped until professional help can be reached. Many large wounds require surgery prior to closure. Puncture wounds should also not be sutured.


It is, therefore, important to be able to properly determine if a wound requires stitches before applying the technique. There are several basic assessments you can make in order to arrive at a decision. Suturing may be required if:

  • Cuts feel numb. Nerves may have been damaged and suturing allows the healing process to begin.
  • Jagged, gaping, or deep cuts. Stitching these types of wounds helps to limit further damage, reduce blood loss, prevent infection and begin the healing process.
  • Cuts that bleed profusely. Suturing will help prevent excessive blood loss.
  • Cuts that are on the face or other sensitive areas. Left unstitched, cuts can leave unattractive scars. However, keep in mind that improper suturing techniques can leave unsightly scars as well.


It should be noted that any medical situation requires the highest level of sterilization as possible. Cleaning the wound of debris and using sterile solutions and equipment is of the utmost importance to prevent infection.

Ensuring Preparedness

Having the knowledge and ability to suture does no good if you do not have the correct supplies. Therefore, being prepared for the unexpected is critical for meeting the need at hand. Although makeshift items could be used in an emergency situation, the correct suturing supplies ensure that the outcome is much more favorable and this should be the focus of anyone willing to meet the call to assist in emergency situations.


You can read more on suturing techniques here.


What do you think? Leave us a comment below.

I really want to become a Doctor – Is there anything I can do straight away?

Check out the How to Suture Wounds on Apprentice Doctor Academy.

Also, explore the Deluxe Suture Kit on Apprentice Doctor Kits.


Techniques of Wound Suturing – Basic and Advanced

One of the most important components of wound care and management, repairing of moderate to serious lacerations and/or wounds resulting from surgery or other procedures is the usage of efficient suturing tools, materials, and techniques.

The main objectives of suturing are the following:

  • Provide effective hemostasis to wounds.
  • Speed up the healing process.
  • Improve the function of the tissue and appearance.

However, a very important point to remember when it comes to suturing wounds is the risk of infection. Therefore great care must be taken in performing the procedure.

A single interrupted suture is the most common technique known by all physicians, and is used for the main purpose of wound closure in a manner that is pleasing to the eye. It doesn’t take long to learn this simple suturing technique; therefore, every person can, and should learn how to treat minor wounds. However, techniques used to suture difficult and challenging wounds can take years to master, and thus should only be performed by a qualified surgeon.

Choosing the right suture technique

According to the condition of the wound and its type, a surgeon can easily choose the right technique of suturing from various techniques to choose and master. Some things to consider, and which will make choosing more easy, is that the edges of the wound should be well approximated, with no distortion and slightly parallel to skin tension lines.

Choosing the right suture technique

According to the condition of the wound and its type, a surgeon can choose from among a variety of suturing techniques. In choosing a surgeon looks to see if the edges of the wound are well approximated, if there is distortion, and if the wound is slightly parallel to skin tension lines.

According to the condition of the wound and its type, a surgeon can choose from among a variety of suturing techniques. In choosing a surgeon looks to see if the edges of the wound are well approximated, if there is distortion, and if the wound is slightly parallel to skin tension lines.

Surgeons will consider one of the following basic suture techniques:

Single Interrupted Suture
This is one of the most basic wound management techniques, generally chosen to close accidental wounds. A synthetic, monofilament and non-absorbable suture are usually chosen to place a series of individual stitches on the skin.

Horizontal Mattress Suture
This is a type of interrupted stitch, and holds the edges of wounds securely while taking the wound edges inside out. This suture is generally applicable for distribution of tension around the wound, especially if the wound is large.

Vertical Mattress Suture
This type of suture supports the wound, provides excellent wound edge eversion and decreases dead space. These sutures can also be attempted in a different fashion with simple interrupted sutures to achieve eversion. The only drawback to this suture is that it may compromise blood flow to the injured tissue.

Sub-cuticular Suture
When the surgeon has to close off dead space, this suture is generally used which may allow blood or fluid to collect around the empty space and promote infection to it. This is performed by a suturing material that is synthetic and has absorbable properties.

Running Suture
In the running suturing technique, a single length of material is used to secure and tie the wound at each end. A non-absorbable and synthetic mono filament is normally used for this process. This method is the fastest to perform although doesn’t work well for irregular shaped wounds.

The techniques used for wound suturing are many and each one should be used according to the nature of the wound.

You can read more on suturing techniques here.

Suturing Course and Kit course from The Apprentice Doctor!

There is no need to wait on getting practice with suturing. Before you step into any situation requiring suturing, even an emergency in your own home, you can perfect your suturing skills. The Apprentice Doctor® Suture Kit & Suturing Training Course teaches you how to confidently close wounds. Begin training today!


We would love to answer any questions you have so leave a comment or question below.


I really want to become a Doctor – Is there anything I can do straight away?

Check out the How to Suture Wounds on Apprentice Doctor Academy.

Also, explore the Deluxe Suture Kit on Apprentice Doctor Kits.


How to Tie a Figure 8 Suture

When are Figure 8 sutures used?

Some doctors use the figure 8 suture as the suturing method of choice when suturing skin wounds/lacerations. The figure 8 suture is most commonly used by health professionals when faced with one of three different scenarios.

  • Patients are hypersensitive or allergic to commonly used resorbable suture materials. Resorbable materials are absorbed over time by the body and do not need to be removed by a medical practitioner.
  • Dehiscence of a previously sutured wound occurs. Dehiscence is when a wound opens again after the sutures are removed.
  • You are closing a skin wound where uneven margins or a dog’s ear defect is anticipated. E.g. a round/elliptical defect.

Suture kit

You will need:

  1. Tissue forceps
  2. A suture needle with an eye
  3. Suture thread
  4. A needle holder
  5. Practice/imitation skin
  6. Good lighting

Step 1

Use the needle with suture material attached, clipped to the needle holder.


Step 2

Use the imitation or practice skin with a ±7 cm (2,5 inch) cut representing a surgical incision or a laceration in the skin.


Step 3

You’ll start the suture in the region of one of the positional markings on the laceration on the imitation skin, on the far side. Evert the far side of the laceration with the tissue forceps and insert the needle between five and ten millimeters (about a quarter inch) away from the wound edge.

figure 8 suture step 3


Step 4

Take a bite in the depth of the subcutaneous tissue on the near side, twisting the needle to let the needle-tip emerge just below the dermis.

figure 8 suture step 4


Step 5

Now mirror the bite on the far side allowing the needle to emerge in the depth of the sub-cutaneous tissue

figure 8 suture step 5


Step 6

Place the last section of the suture by penetrating the tissue on the near side just below the dermis, with the needle facing upwards. Allow the needle tip to emerge about three millimeters away from the edge of the wound on the near side.

figure 8 suture step 6


Step 7

Tie an instrument square knot or a surgeons knot. Cut both ends of the suture leaving at least three millimeters of suture material beyond the knot.


Step 8

Place a second figure-8 suture about three millimeters to the right of the first suture by repeating Steps 4 and 5.


Step 9

Follow up with more figure-8 sutures until the laceration is closed. When all is said and done this is the path of the suture. In top left, then bottom right, then bottom left, then out top right.

figure 8 suture step 9


Advantages of using the figure-8 suturing technique

  • It is removable. Traditional subcutaneous sutures cannot be removed and must be resorbable. In other words, it must be made of material that can be absorbed by the body’s tissue enzymes.
  • It allows closure of two layers simultaneously.
  • Compared with the interrupted stitch, ischemia at the edge of the suture is reduced. Ischemia is a reduction in the blood supply to the body tissue.
  • Being removable, one avoids burying foreign material in the depth of the tissue, minimizing the chances of developing a stitch abscess or related complications.
  • This technique enables any length difference between the flaps to be evened up when sutured.
  • It minimizes “dog’s ear” defects.


Disadvantages of using the figure-8 suturing technique

  • The figure-8 suturing technique is more difficult to master and perform properly compared to interrupted sutures.
  • Patients experience slightly more discomfort on stitch removal compared to the interrupted sutures.

Professor Lemmer was one of Dr Anton Scheepers’ medical school professors. He was kind enough to write this foreword to the How To Suture Wounds Course and new book by the same title.

“In any practical endeavor, from writing a book, to painting a picture, to performing a surgical operation, knowledge of the subject, no matter how profound, can never by itself lead to a satisfactory outcome. A sound grounding in the basic skills of the discipline is an essential prerequisite.

Technical skill is the handmaiden of all knowledge applied to practical ends. In the field of practical surgery, suturing technique is the most basic skill, yet all too often, even for those at an advanced level of surgical training, special courses in surgical techniques are sometimes found to be necessary to make up for deficiencies in earlier training.

Dr Anton Scheepers, a practicing maxillofacial and oral surgeon of many years experience, has reduced the topic of surgical suturing in all its variety to basic step-by-step technique, with comments on wound care, and has presented this in a form that will be both educational and skill-promotive.

This manual can serve as an appetite-whetter for high school students interested in careers in any clinical field, as a revision for medical, dental, veterinary and paramedical practitioners, and – dare one say? – it might even be useful in junior specialist surgical training.

The author is to be commended.” – J. Lemmer (Professor Emeritus of Oral Medicine and Periodontology, University of the Witwatersrand, Johannesburg, Honorary Professor of Periodontology and Oral Medicine, Honorary Fellow of the Colleges of Medicine)

I really want to become a Doctor – Is there anything I can do straight away?

Check out the How to Suture Wounds on Apprentice Doctor Academy.

Also, explore the Deluxe Suture Kit on Apprentice Doctor Kits.


IMPORTANT! A major website update has been made. Any issues, notify us instantly by pressing the "Quick Help" button and leaving a short description of what you experienced.